

Reflow requires Niagara 4.10 or later. See Requirements for the
full list before you begin.
Installing on Workbench and Local Stations
- Copy
reflow-rt.jarandreflow-ux.jarinto your Niagara modules directory, typically located atC:\Niagara\Niagara-4.x.x\modules. - Close and reopen Workbench so it loads the new modules.
- Connect to your local platform, open the Application Director, and restart any running local stations.
Installing on Remote Stations
Complete the local installation steps above before installing Reflow on a remote station.
Opening the Software Manager
The Software Manager belongs to the remote station’s platform, not the station itself, so connect there first.- In Workbench, connect to the remote station’s Platform.
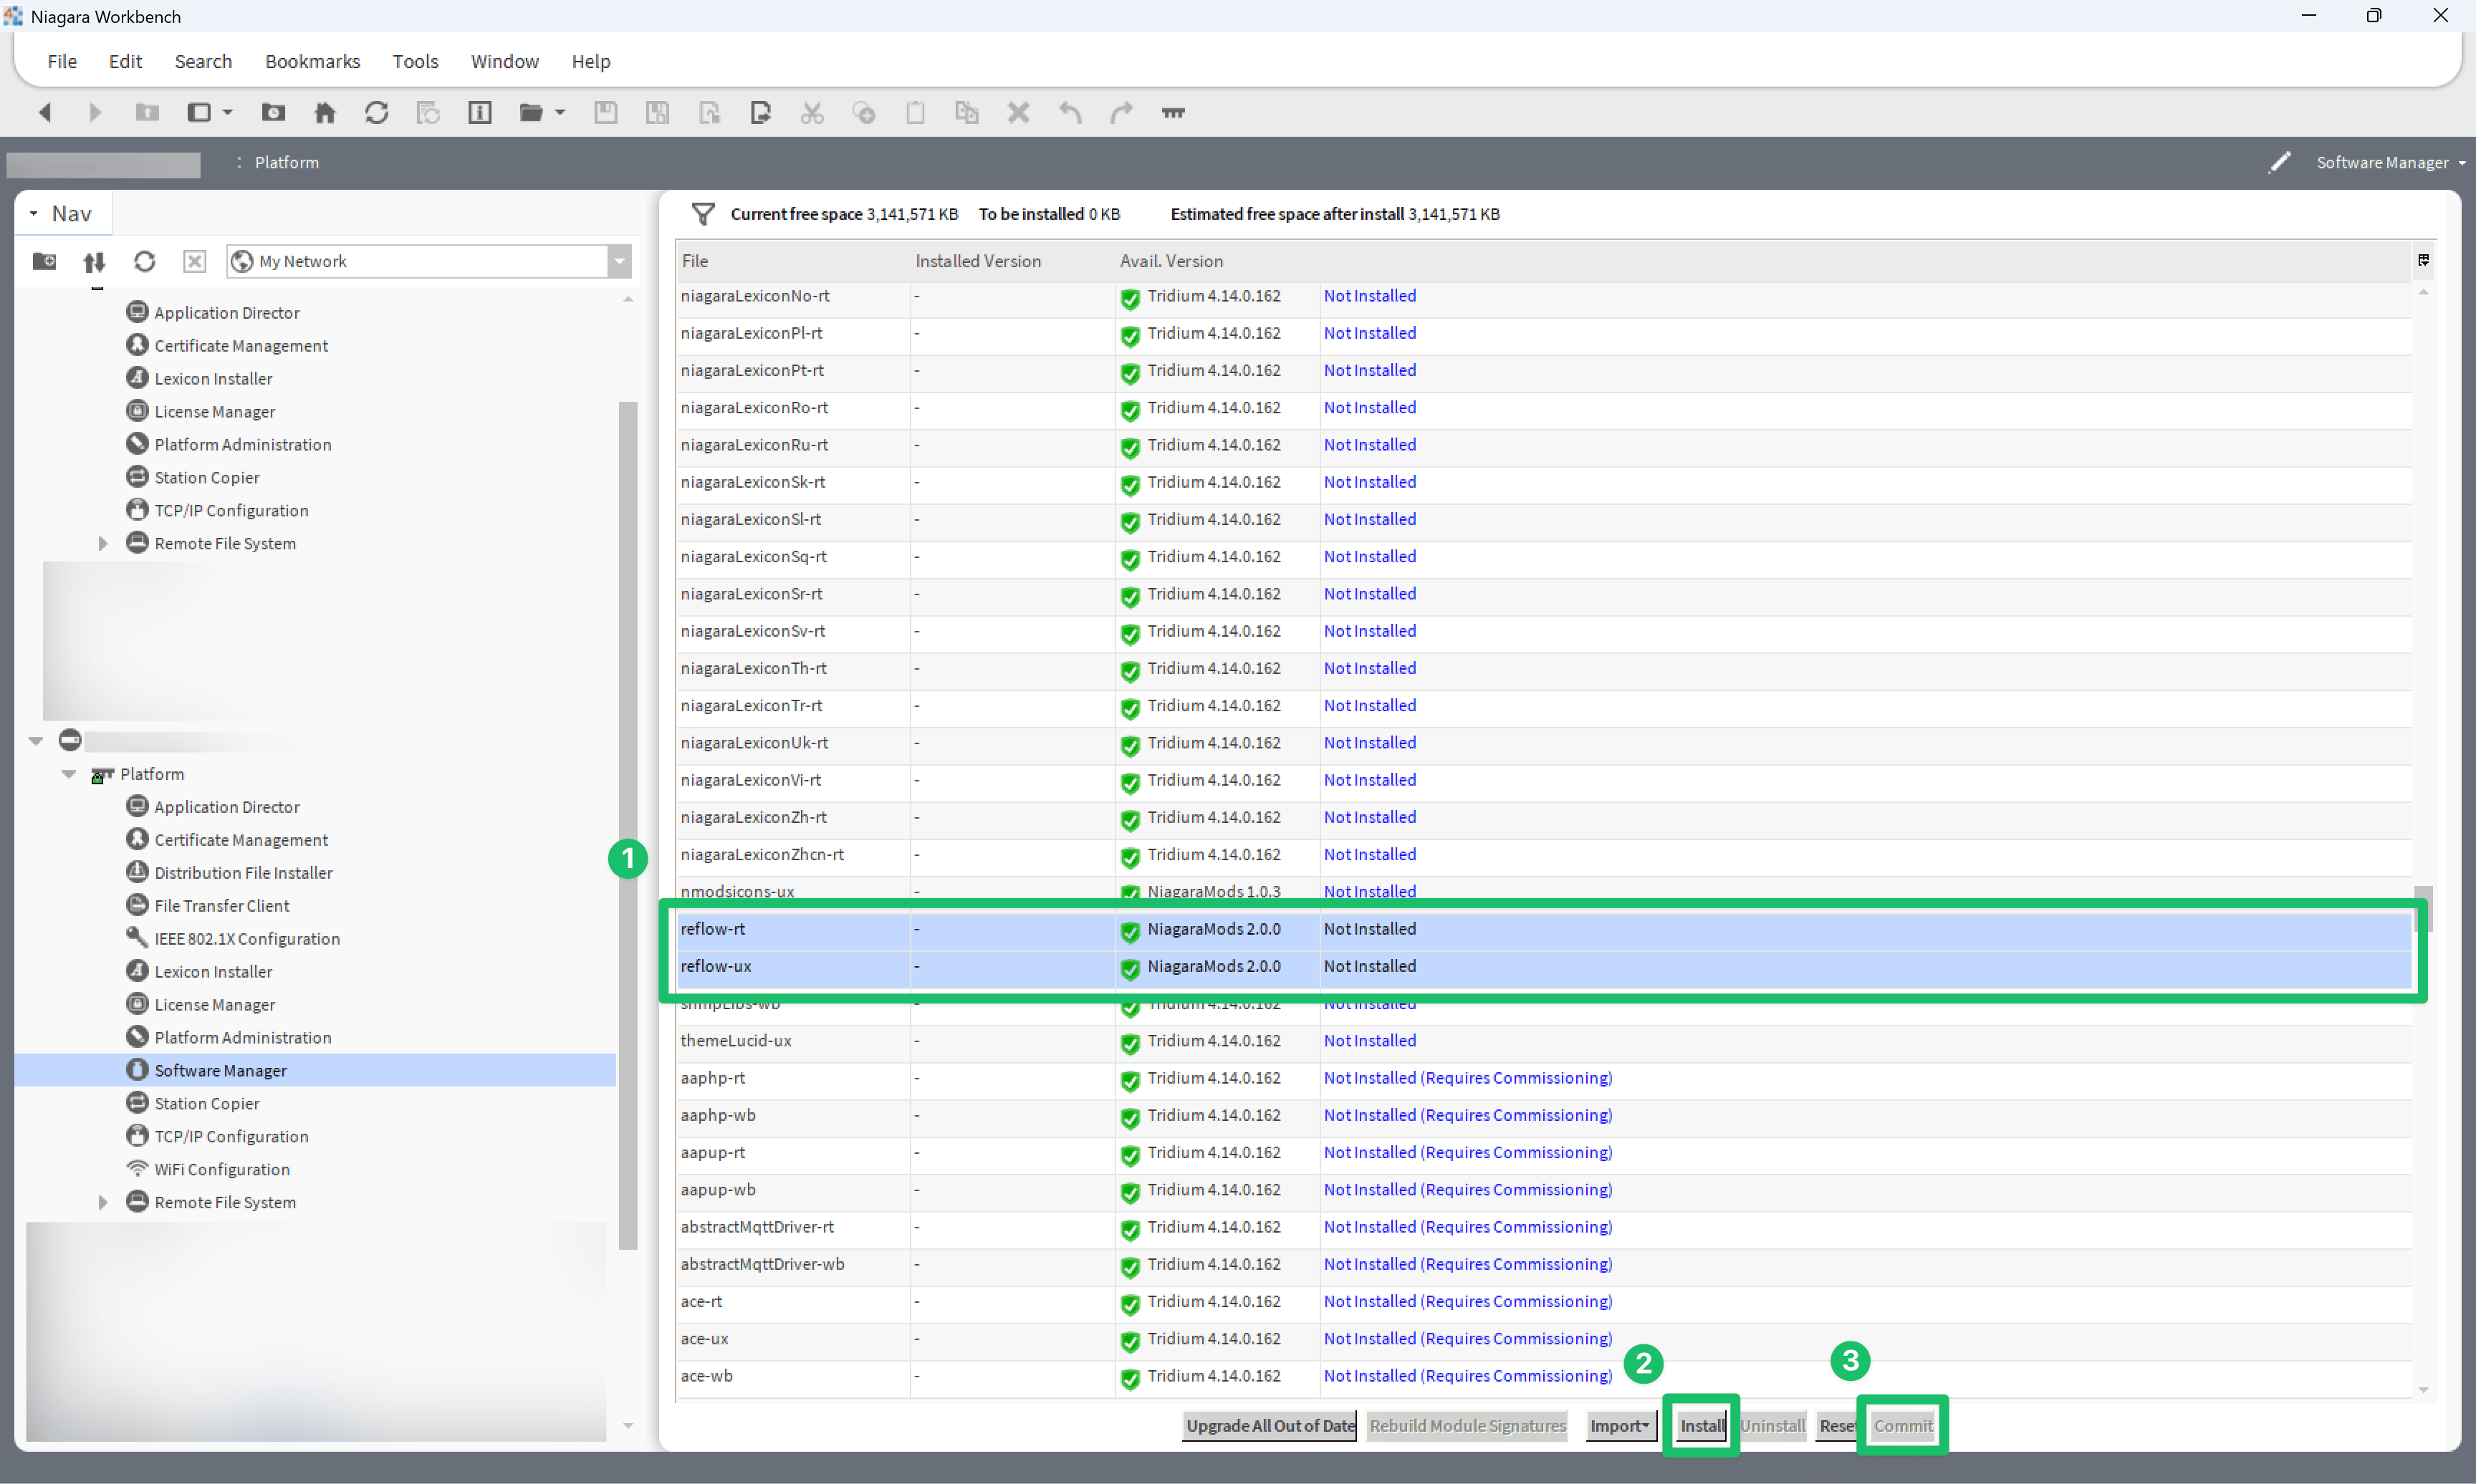
- Expand the platform tree and open the Software Manager.
- Wait for the list of available modules to load.
Installing the Modules
With the module list loaded, install both Reflow modules and commit the change.- Select reflow-rt and reflow-ux.
- Click Install.
-
Click Commit.
-
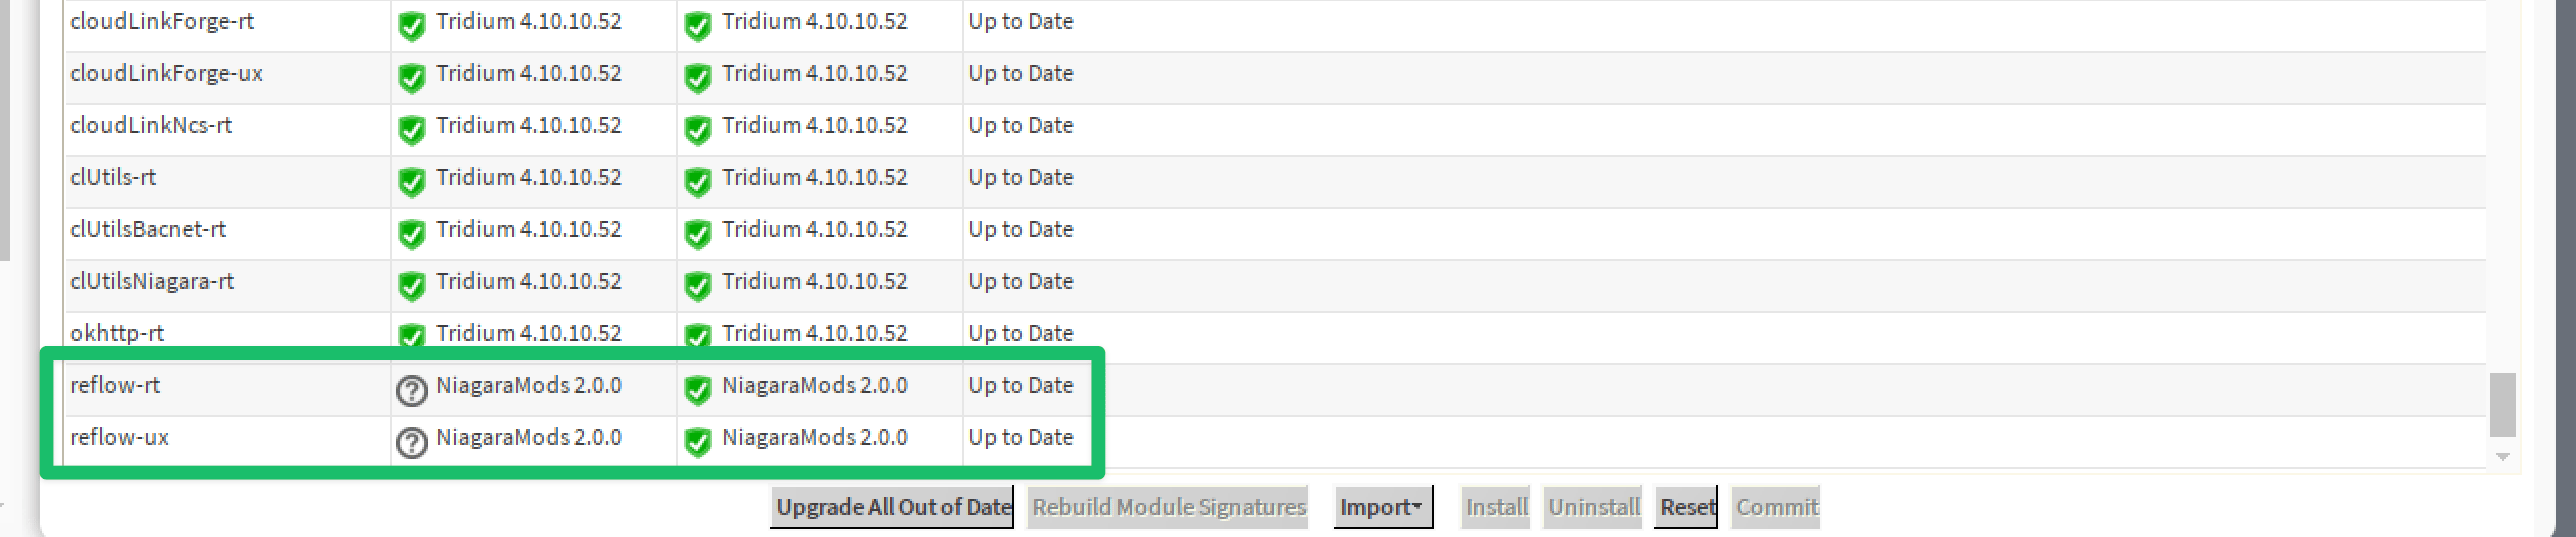
Scroll to the bottom of the list to confirm both modules are up to date.
- Restart the remote station using the Application Director.